How To Drain Your Backflow

1.  Turn the water off to your sprinkler system.  Usually in your basement or crawl space.

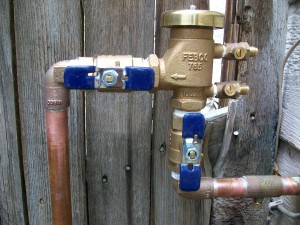
Shut off valve in the normal operating position (On).

Shut off valve in the normal operating position (On).

Shut off valve in the "Off" position.

Shut off valve in the “Off” position.

2. Go outside and turn all of the ball valves on your Backflow to a 45 degree angle as pictured below.  Make sure you do this to all 4 ball valves.  Two should have big handles like the blue handles below and two are the little flat head screwdriver slotted test cock valves that stick out of the side, sometimes they are in different locations depending on which brand of backflow you have.

From this.

Ball valves in operating position.

Ball valves in normal operating position.

To this.

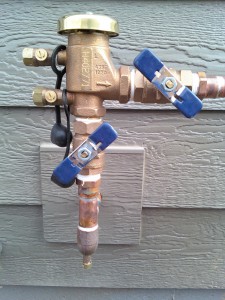
Ball valves at a 45 degree angle for winterization.

Ball valves at a 45 degree angle for winterization.

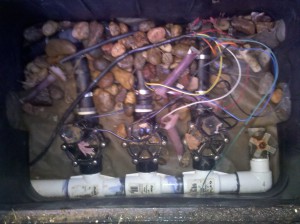
3.  Open up your valve box/es and open the drain/s.  Valve boxes are in the ground and usually green.  Drain valves are usually located at the end of the line past the last zone valve.  Most of them have a cross shaped handle, but some of them are ball valves similar to the valves on your back flow and can be plastic.  By opening your drain valve/s in the valve box/es, the water will drain off of the front side of your backflow and copper pipe exposed to the air, and will drain your mainline that connects to your valves.  Pictured below, drain valve is on the right bottom of the picture (cross handle).

Valve box with 3 zone valves and one drain valve.

Valve box with 3 zone valves and one drain valve.

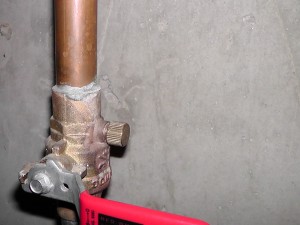
4.  Bring a large cup, bowl or bucket and go back to your basement or crawl space and open the drain to drain the back side of your backflow and pipe.  These drains are usually attached to the valve that you shut off the system with. Pictured below.  They are usually a little tiny cap that unscrews to let the water out.  But it is very important to do steps 1-3 before opening this drain cap or you willl not get all of the water out.   When done draining, leave this cap loose or unscrewed with a bucket underneath to catch any dripping if possible.
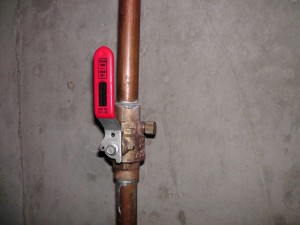
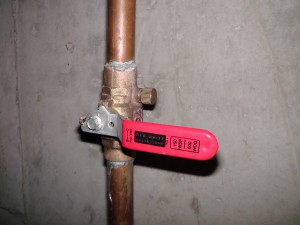
Drain cap on the right.

Drain cap on the right.

That’s it.

  • “Happy Roots is the best company I have worked with in a long time. They are truly a service company and know how to treat their customers… I always know when they are coming, what they are doing and the cost associated with their service. They are always on time & deliver excellent quality. I highly recommend the company.”

    Randy K.
    Westminster, CO 80031
  • Can’t say enough about these guys! We had used other lawn services the previous two years we’ve been in our home. Les and his team is what we’ve been looking for….local, know their business and deliver excellent service from the front desk to the techs!

    Jeff D.
    Brighton, CO 80601
  • “Thanks to Happy Roots, we had one of the best looking yards on the block! I have used several other companies before, and none can compare to Happy Roots!…”

    Jennifer P.
    Broomfield, CO 80020
  • “…The customer service and the interaction with all their employees have been nothing less than exceptional!!!  We all work very hard for our income, and it is refreshing to get the best value and service for the money…”

    Mike T.
    Brighton, CO
  • “Always thoughtful, kind, knowledgeable, expedient. It is nice to have help you completely trust.”

    Ann D.
    Broomfield, CO 80023
  • “I’ve been working with Happy Roots for over a decade and throughout that time their care of my lawn/yard and overall customer service has been outstanding. Highly, highly recommended!”

    Beau F.
    Thornton, CO 80602
Get a Free Quote or Sign Up!
go
  • angieslist2015
  • angiessuperservice2014

  • 13ANG0007_SuperServiceLogo_Final_LessGradient-2200px

  • dave-ramsey

  • angies-list

  • ASSE

  • calp

  • landscapeinudstry

  • departmentofag

  • selectcertified

  • planet_pln